
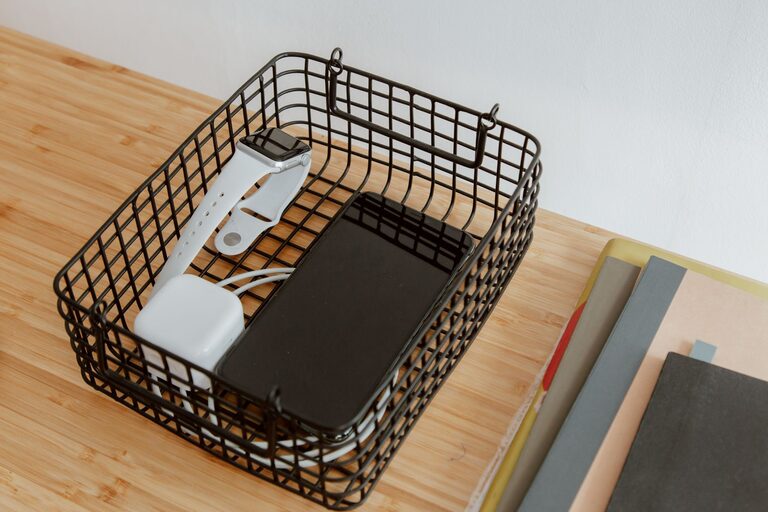
How to Set Up a Safe, Organized Charging Station
A dedicated charging station can make everyday life easier. Instead of searching for cables or filling every outlet in the room, you can keep your devices, chargers, and cords in one organized location.
The best charging station does more than reduce clutter. It also helps you choose compatible chargers, protect cables from damage, and keep electronics in a safe, convenient place. Whether you need a small setup for a nightstand or a larger station for the whole family, the process is straightforward.
Choose the Right Location
Start by selecting a practical location for your charging station. Look for a spot that is easy to reach but does not interfere with normal activity.
Good locations may include:
– A desk or home office shelf
– A bedside table
– A kitchen counter away from water
– An entryway table
– A living room cabinet
– A dedicated shelf or drawer
Keep the station away from sinks, stovetops, heaters, direct sunlight, and areas where liquids may spill. Avoid placing it where cables can become a tripping hazard or where children and pets can easily pull devices onto the floor.
The surface should be stable and large enough to hold the charging equipment without crowding. If you plan to charge several devices at once, make sure there is room for each device to rest safely while connected.
Decide Which Devices You Will Charge
Make a list of the devices that will regularly use the station. This helps you choose the right number and type of ports.
Common devices include:
– Smartphones
– Tablets
– Smartwatches
– Wireless earbuds
– E-readers
– Cameras
– Game controllers
– Laptops
– Portable batteries
– Fitness trackers
Consider how many devices may be connected at the same time. A station for one person might need only two or three ports, while a shared family station may need six or more.
It is also useful to identify which devices use the same connector. Many newer products charge through USB-C, while older devices may use USB-A, Lightning, or a device-specific cable. Keeping a mix of cables can make the station more useful.
Select a Suitable Power Source
You can power a charging station with a wall charger, a multiport USB charger, or a power strip with built-in USB ports. Choose a product from a reputable manufacturer and check that it is designed for the devices you plan to charge.
A multiport charger can reduce clutter because several cables connect to one wall outlet. Look for features such as:
– Enough ports for your devices
– Appropriate power output
– Overcurrent and overheat protection
– A sturdy design
– Clear safety certifications
– A cable long enough for your layout
Not every port provides the same amount of power. Some are intended for phones and small accessories, while others can support tablets or laptops. Check the requirements of each device and follow the charger manufacturer’s specifications.
USB-C Power Delivery, often called USB-C PD, can provide different levels of power depending on the charger, cable, and connected device. A compatible device generally manages how much power it receives, but you should still use quality products that match the manufacturer’s recommendations.
Use the Right Cables
Cables are often the messiest part of a charging station. Before buying new ones, gather your existing cables and remove those that are damaged, unreliable, or no longer needed.
Replace any cable with:
– Frayed insulation
– Exposed wires
– Bent or loose connectors
– Burn marks
– A connection that repeatedly cuts out
Choose cables that are long enough to reach the device without excess slack. Very long cables can create clutter, while cables that are too short may place strain on the connector.
You can also label cables by device or household member. Small tags, colored clips, or different cable colors make it easier to identify the correct cable quickly.
Add a Stand, Tray, or Organizer
A charging station works best when devices have a designated place to rest. A stand or tray keeps screens visible and prevents phones from sliding behind furniture.
Useful organizing options include:
Charging stands
A charging stand holds a phone or tablet upright while it charges. This saves space and makes notifications or charging status easy to see.
Cable management boxes
A cable box hides excess cord length and can make a desk or counter look cleaner. Place the power strip or charger inside only if the product is designed for that use and ventilation remains adequate. Do not cover equipment that becomes warm during operation.
Drawer organizers
A shallow drawer with dividers can hold cables, adapters, and small devices. If you charge devices inside a drawer, leave it open enough to allow airflow and avoid placing heat-producing equipment in a tightly enclosed space.
Cable clips and sleeves
Clips keep cables near the edge of a desk or shelf. Sleeves can group several cables together, but avoid bundling them so tightly that they become difficult to inspect or replace.
Plan the Layout
Place the power source where it can remain connected without stretching the cord. Arrange cables so each one follows a simple path from the charger to its device.
A practical layout might include:
- The power strip or multiport charger at the back of the station
- Cable clips along the rear or edge of the surface
- Frequently used devices in the front
- Less frequently used cables stored in a labeled container
- A small open area for devices that need to cool
Leave enough space between devices to prevent them from piling on top of one another. Tablets and laptops may need more room than phones or earbuds.
Follow Basic Charging Safety
Charging equipment is generally easy to use, but basic precautions are important.
Use these habits:
– Keep chargers and cables dry.
– Do not use damaged charging equipment.
– Avoid connecting too many high-power devices to one outlet.
– Keep ventilation openings clear.
– Do not place chargers under pillows, blankets, or clothing.
– Unplug equipment that is damaged or unusually hot.
– Use the correct charger and cable for each device.
– Keep the station away from water and heat sources.
If you use a power strip, do not connect one power strip to another. Check the strip’s capacity and avoid exceeding the number of devices it is designed to support. For a permanent or built-in electrical installation, consult a qualified electrician rather than attempting to modify household wiring.
Keep the Station Easy to Maintain
An organized charging station should remain convenient over time. Once a month, inspect the cables and remove items you no longer use. Dust the surface and check that the charger and power strip are not getting unusually hot during normal use.
If a device charges slowly, check the cable, port, and charger before replacing everything. Try a different compatible cable or port to identify the source of the problem. Keep instruction manuals or product information nearby for unfamiliar chargers.
It can also help to establish a simple household rule: devices return to the charging station when they are not being used. This keeps the area organized and helps prevent lost cables.
Create a Setup That Fits Your Routine
The ideal charging station does not need to be expensive or complicated. A small tray, a reliable multiport charger, and a few well-labeled cables may be enough. Larger households may benefit from separate sections for each person or device type.
Focus on accessibility, compatibility, airflow, and safe cable placement. With the right location and a little planning, a charging station can keep your devices ready to use while making your home or workspace cleaner and easier to manage.
